
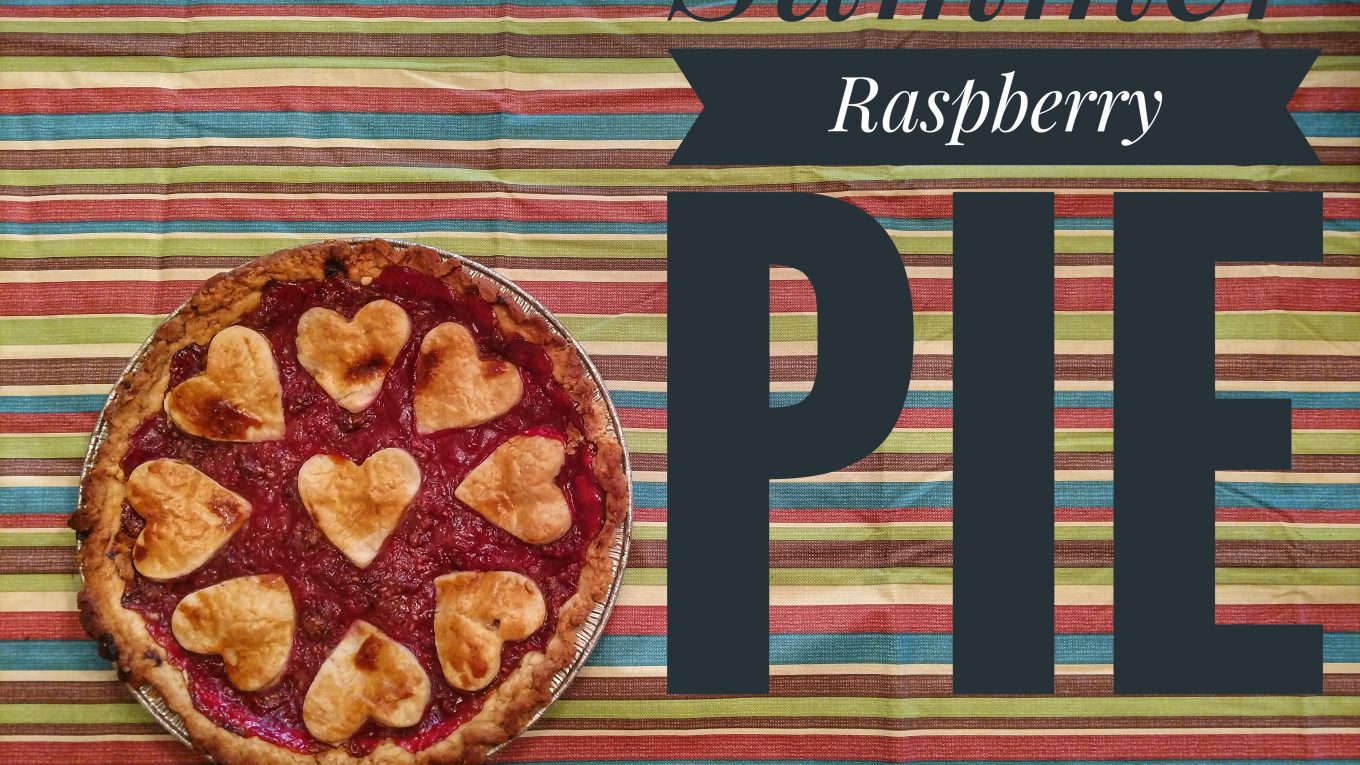
Summer Raspberry Pie
Tomorrow we’re having family over for dinner. I planned on grilling chicken, zucchini and making macaroni salad. My brother decided he wanted to learn how to make a good pie crust, so he’s going to help me make raspberry pie for dessert. This pie crust reminds me a little of short bread. I am going to do a flakier, more pastry style crust recipe later.
My grandmother taught me how to make pie crust. Apparently, making pie crusts well skips a generation in my family most of my aunts and my mother have trouble with it. It is a great skill to learn. You can make so many different dishes using that same crust recipe. The most difficult part of making a pie is not overworking the crust. I have had several people tell me they cannot make pie crust. I think most of it just has to do with trusting that it will all be okay. I’m GREAT at making apple pie, but raspberry is not one of my strengths. We wanted to pick a two crusted pie to practice, and last week Aldi’s had raspberries half price.
Ingredients for the crust:
2 1/2 c flour
1/2 c shortening
5 T butter (salted)
1/2 t salt
3-8 T ice cold water
Ingredients for pie:
18 oz raspberries
1 c sugar
1 t vanilla
1/4 c corn meal
1/4 c flour
Juice of 1/2 of one lemon
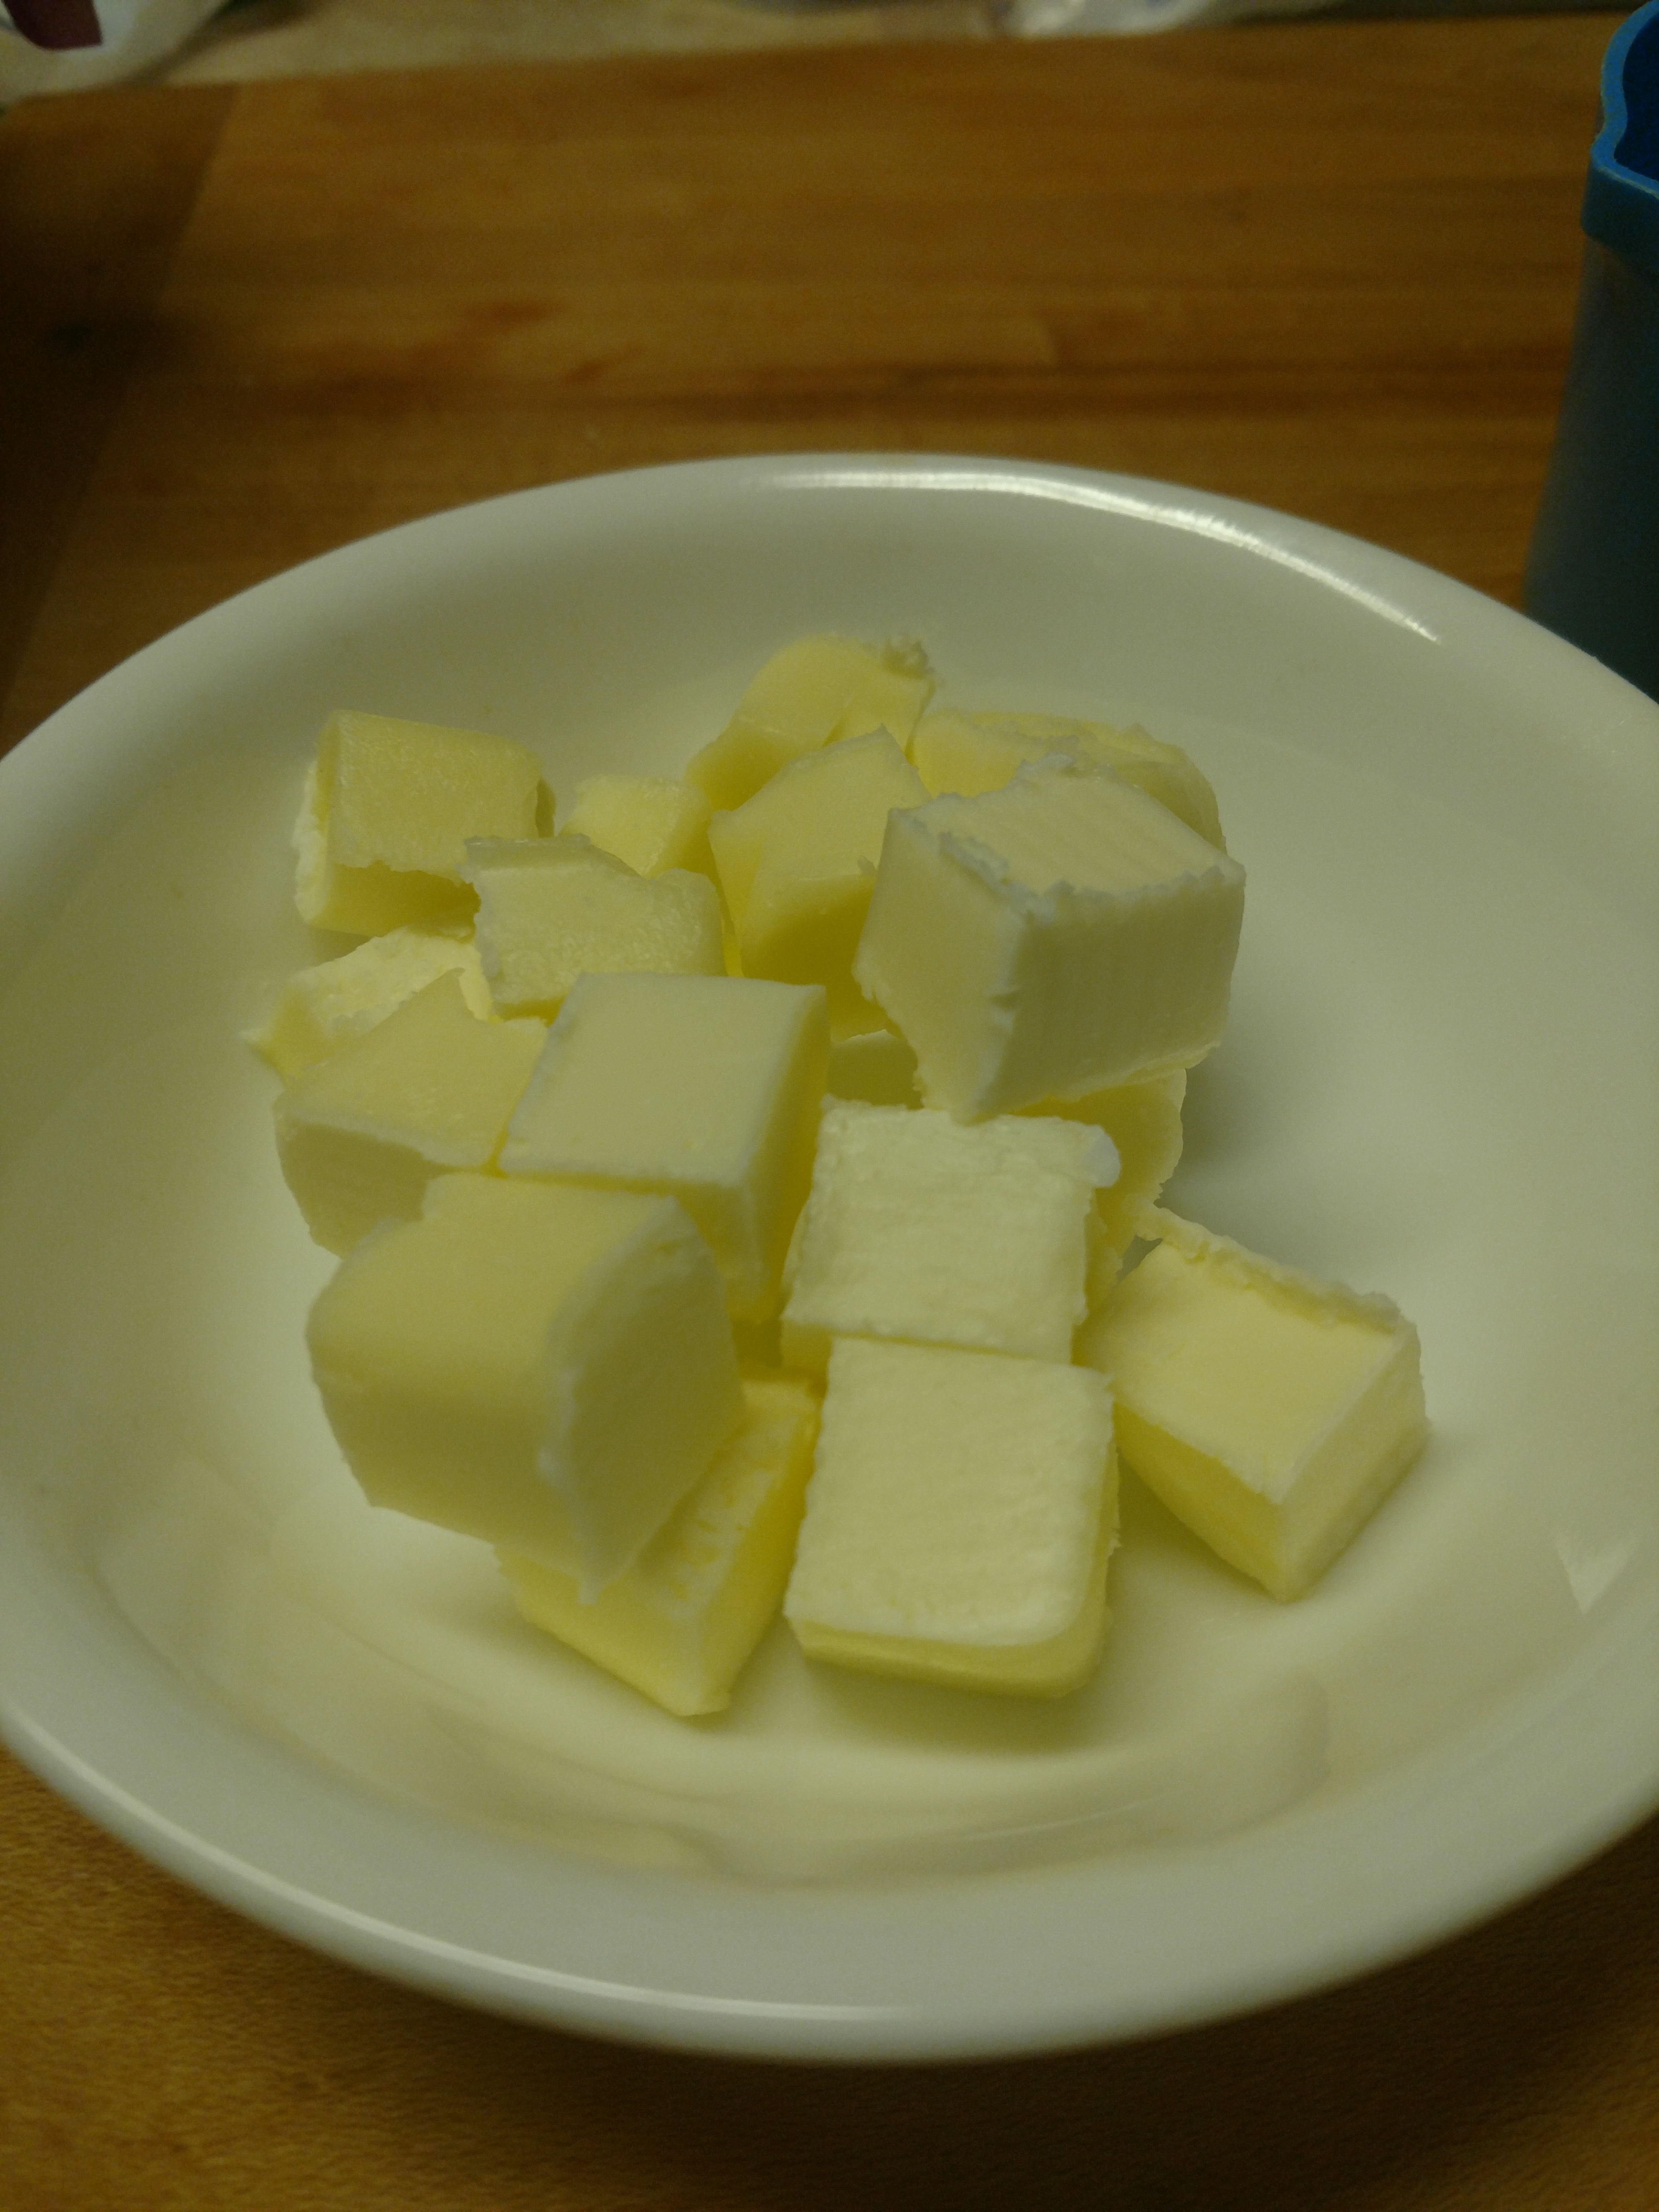
1: Cut butter and shortening into Small squares. Place into freezer.
2: Put ice cubes and water into a cereal bowl. You will need this later, but right now it just needs to get cold.
3: Clean and prepare raspberries. Pick out any that are questionable.
4: Place prepared raspberries in a colander over a bowl. Sprinkle some of your sugar over berries to remove some of the juice. This will help keep your pie crust from being soggy.
5: Begin making the crust. Sift salt into flour. Using a mixer, pastry cutter or food processor, add the butter and shortening. Try to mix the dough as little as possible. Mix the butter and shortening into the flour until the lumps are roughly the same size.
6: Using a tablespoon, slowly add water to the mixture one tablespoon at a time. Add enough water so that the dough pulls together and you can make it into a ball. It should be slightly stretchy. I have to use about four tablespoons.
7: Divide the dough into two equal parts. Make a disc out of each half, roughly the size of a CD or DVD. Wrap eah piece in plastic wrap and place it into the freezer.
8: Wait about 30 minutes for the dough to get cold.
9: Prepare your pie plate and your rolling surface. Use a marble countertop, a pastry board or a rolling mat if possible. The smooth surfaces will make it easier to pick the crust up and put it into the pie pan.
10: Mix the rest of your filling ingredients together in a bowl. 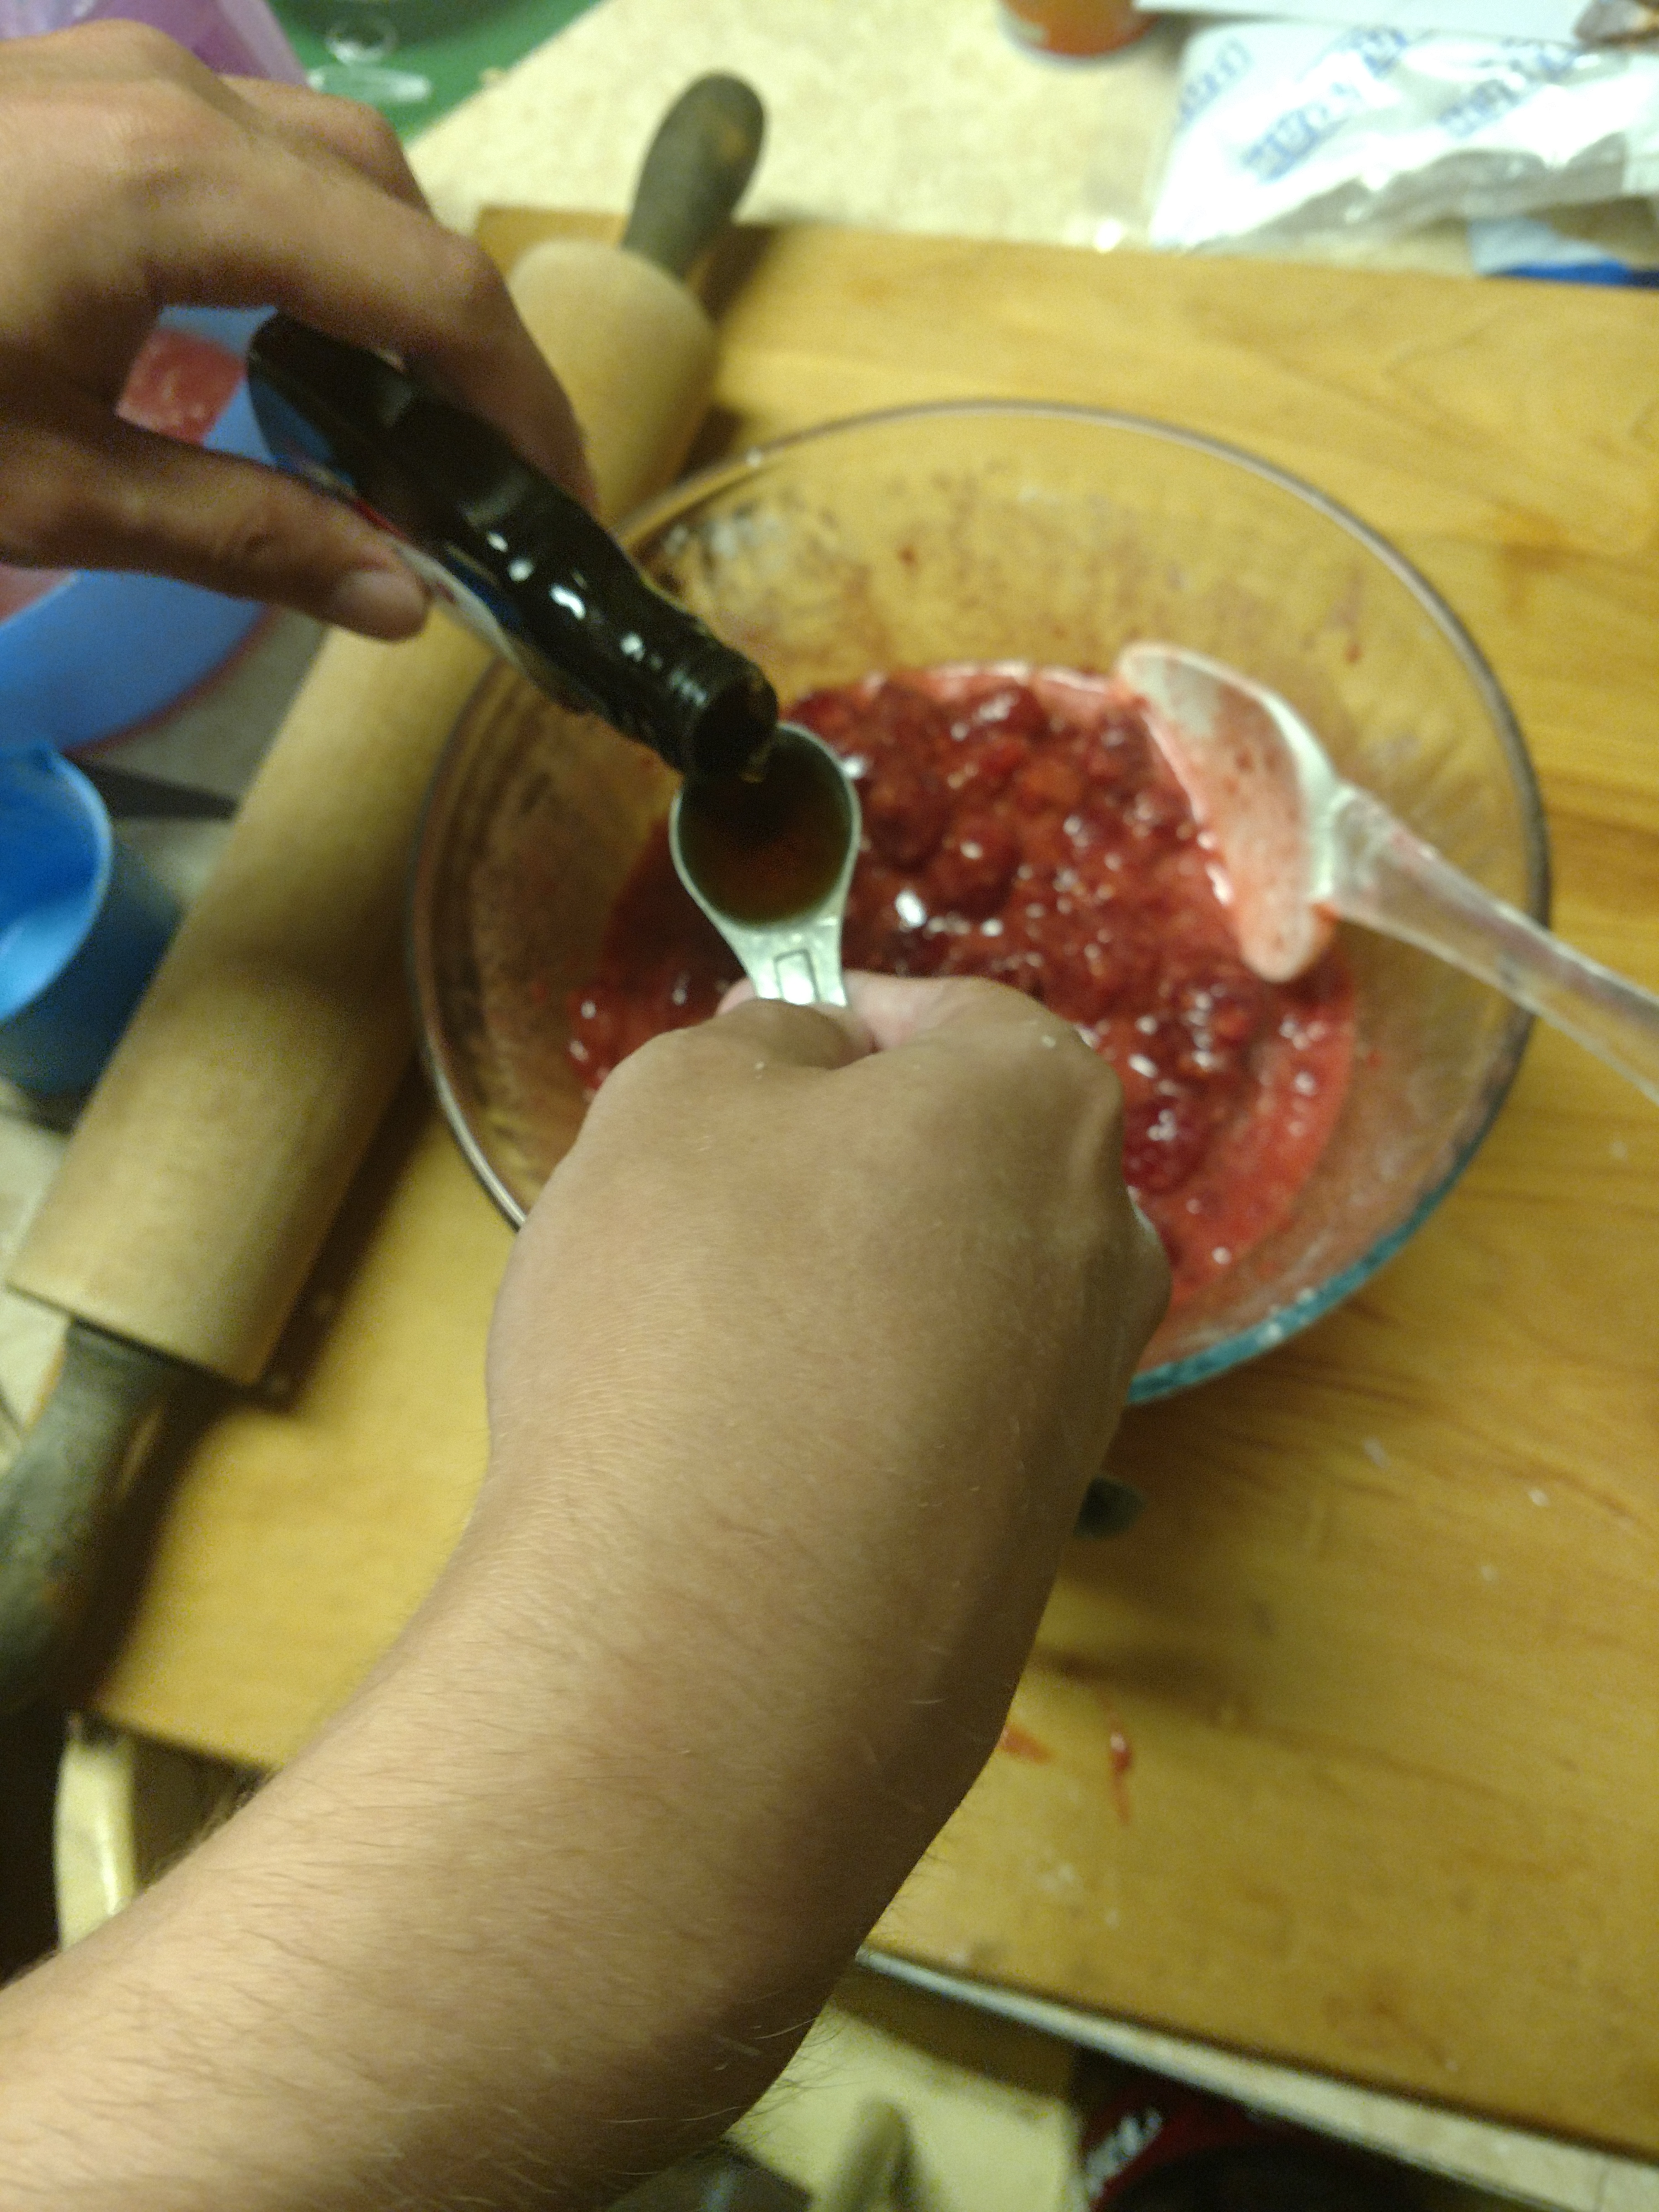
11: Preheat the oven to 400 degrees F.
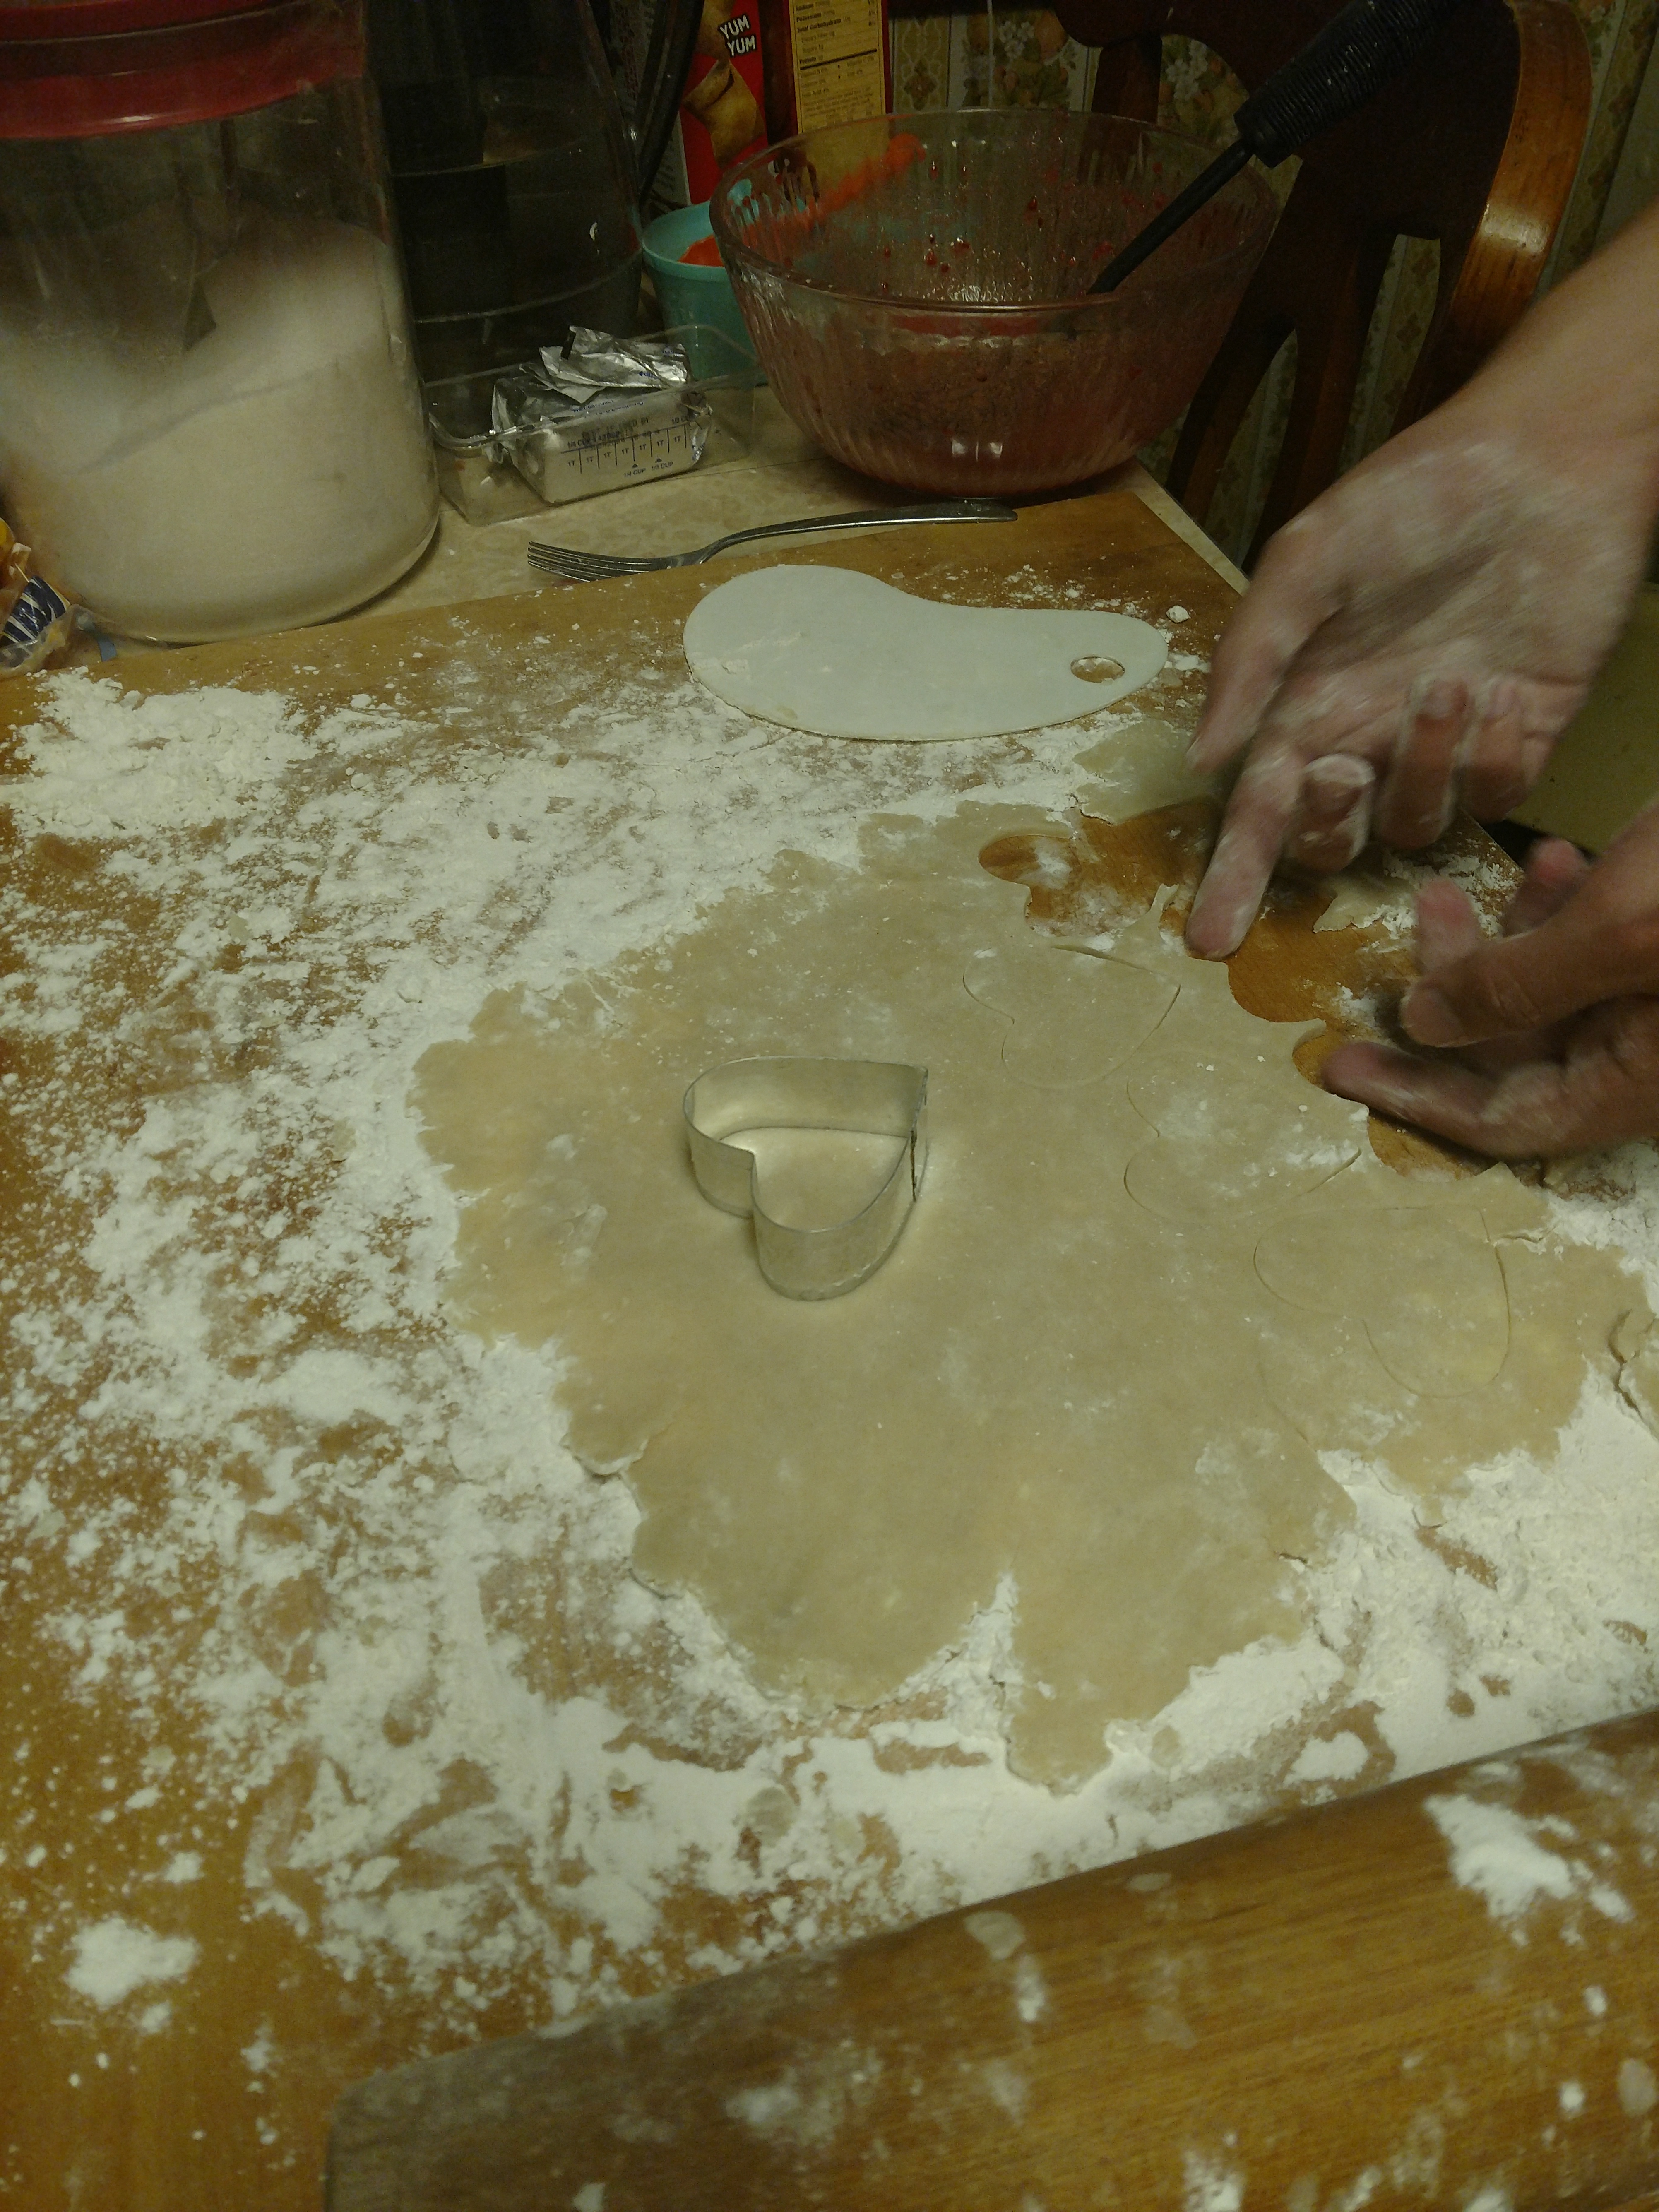
12: Get the first crust out of the freezer. Unwrap it and place it in the middle of your rolling area. Starting in the middle, roll the crust outward. You want to roll evenly, and try to keep the circular shape. If the dough starts to crack, try to pinch it back together, or add some dough from the edge back to the place where it has broken and continue rolling. Roll until your dough is thin enough to cover the 9 in pie pan. I check it by placing the pan upside down on my dough. My rule is about 1 in beyond the pan. Do your best to keep the dough at even thickness. It will help your pie back better. If there is a place that is still really thick, roll it out a little more there.
13: Trim the edges of the dough anywhere you have more than 1 in beyond the pan.
14: Using a plastic dough scraper or a rubber spatula, loosen the dough from the rolling surface. Pick the dough up and place it in the pie pan. You can roll the dough onto the rolling pin and unroll it over the pie plate if you choose. You do not want to squish it down into the pan or it will be difficult to remove once baked. If there are any places that the dough has ripped, pinch them back together. Some people suggest poking the crust with a fork, but I only do this when I blind bake a crust.
15: Using a slotted spoon, spoon the raspberry mixture into the pie crust. Leaving the excess liquid in the bowl instead of pouring it into the pie will help your crust to be crunchy and flaky.
16: Get the second crust out of the freezer. Roll it out to approximately the same size you rolled the first crust. You can place the entire rolled crust on top of the constructed pie, or using a cookie cutter, gently cut out the shapes you want on top of your pie. Do not press too hard; you do not want to damage your pastry board. Smaller shapes work better in my experience. You can also cut the crust into strips to create a lattice. We chose a 1.5 inch heart. We cut out 9 hearts and arranged them across the top of the pie.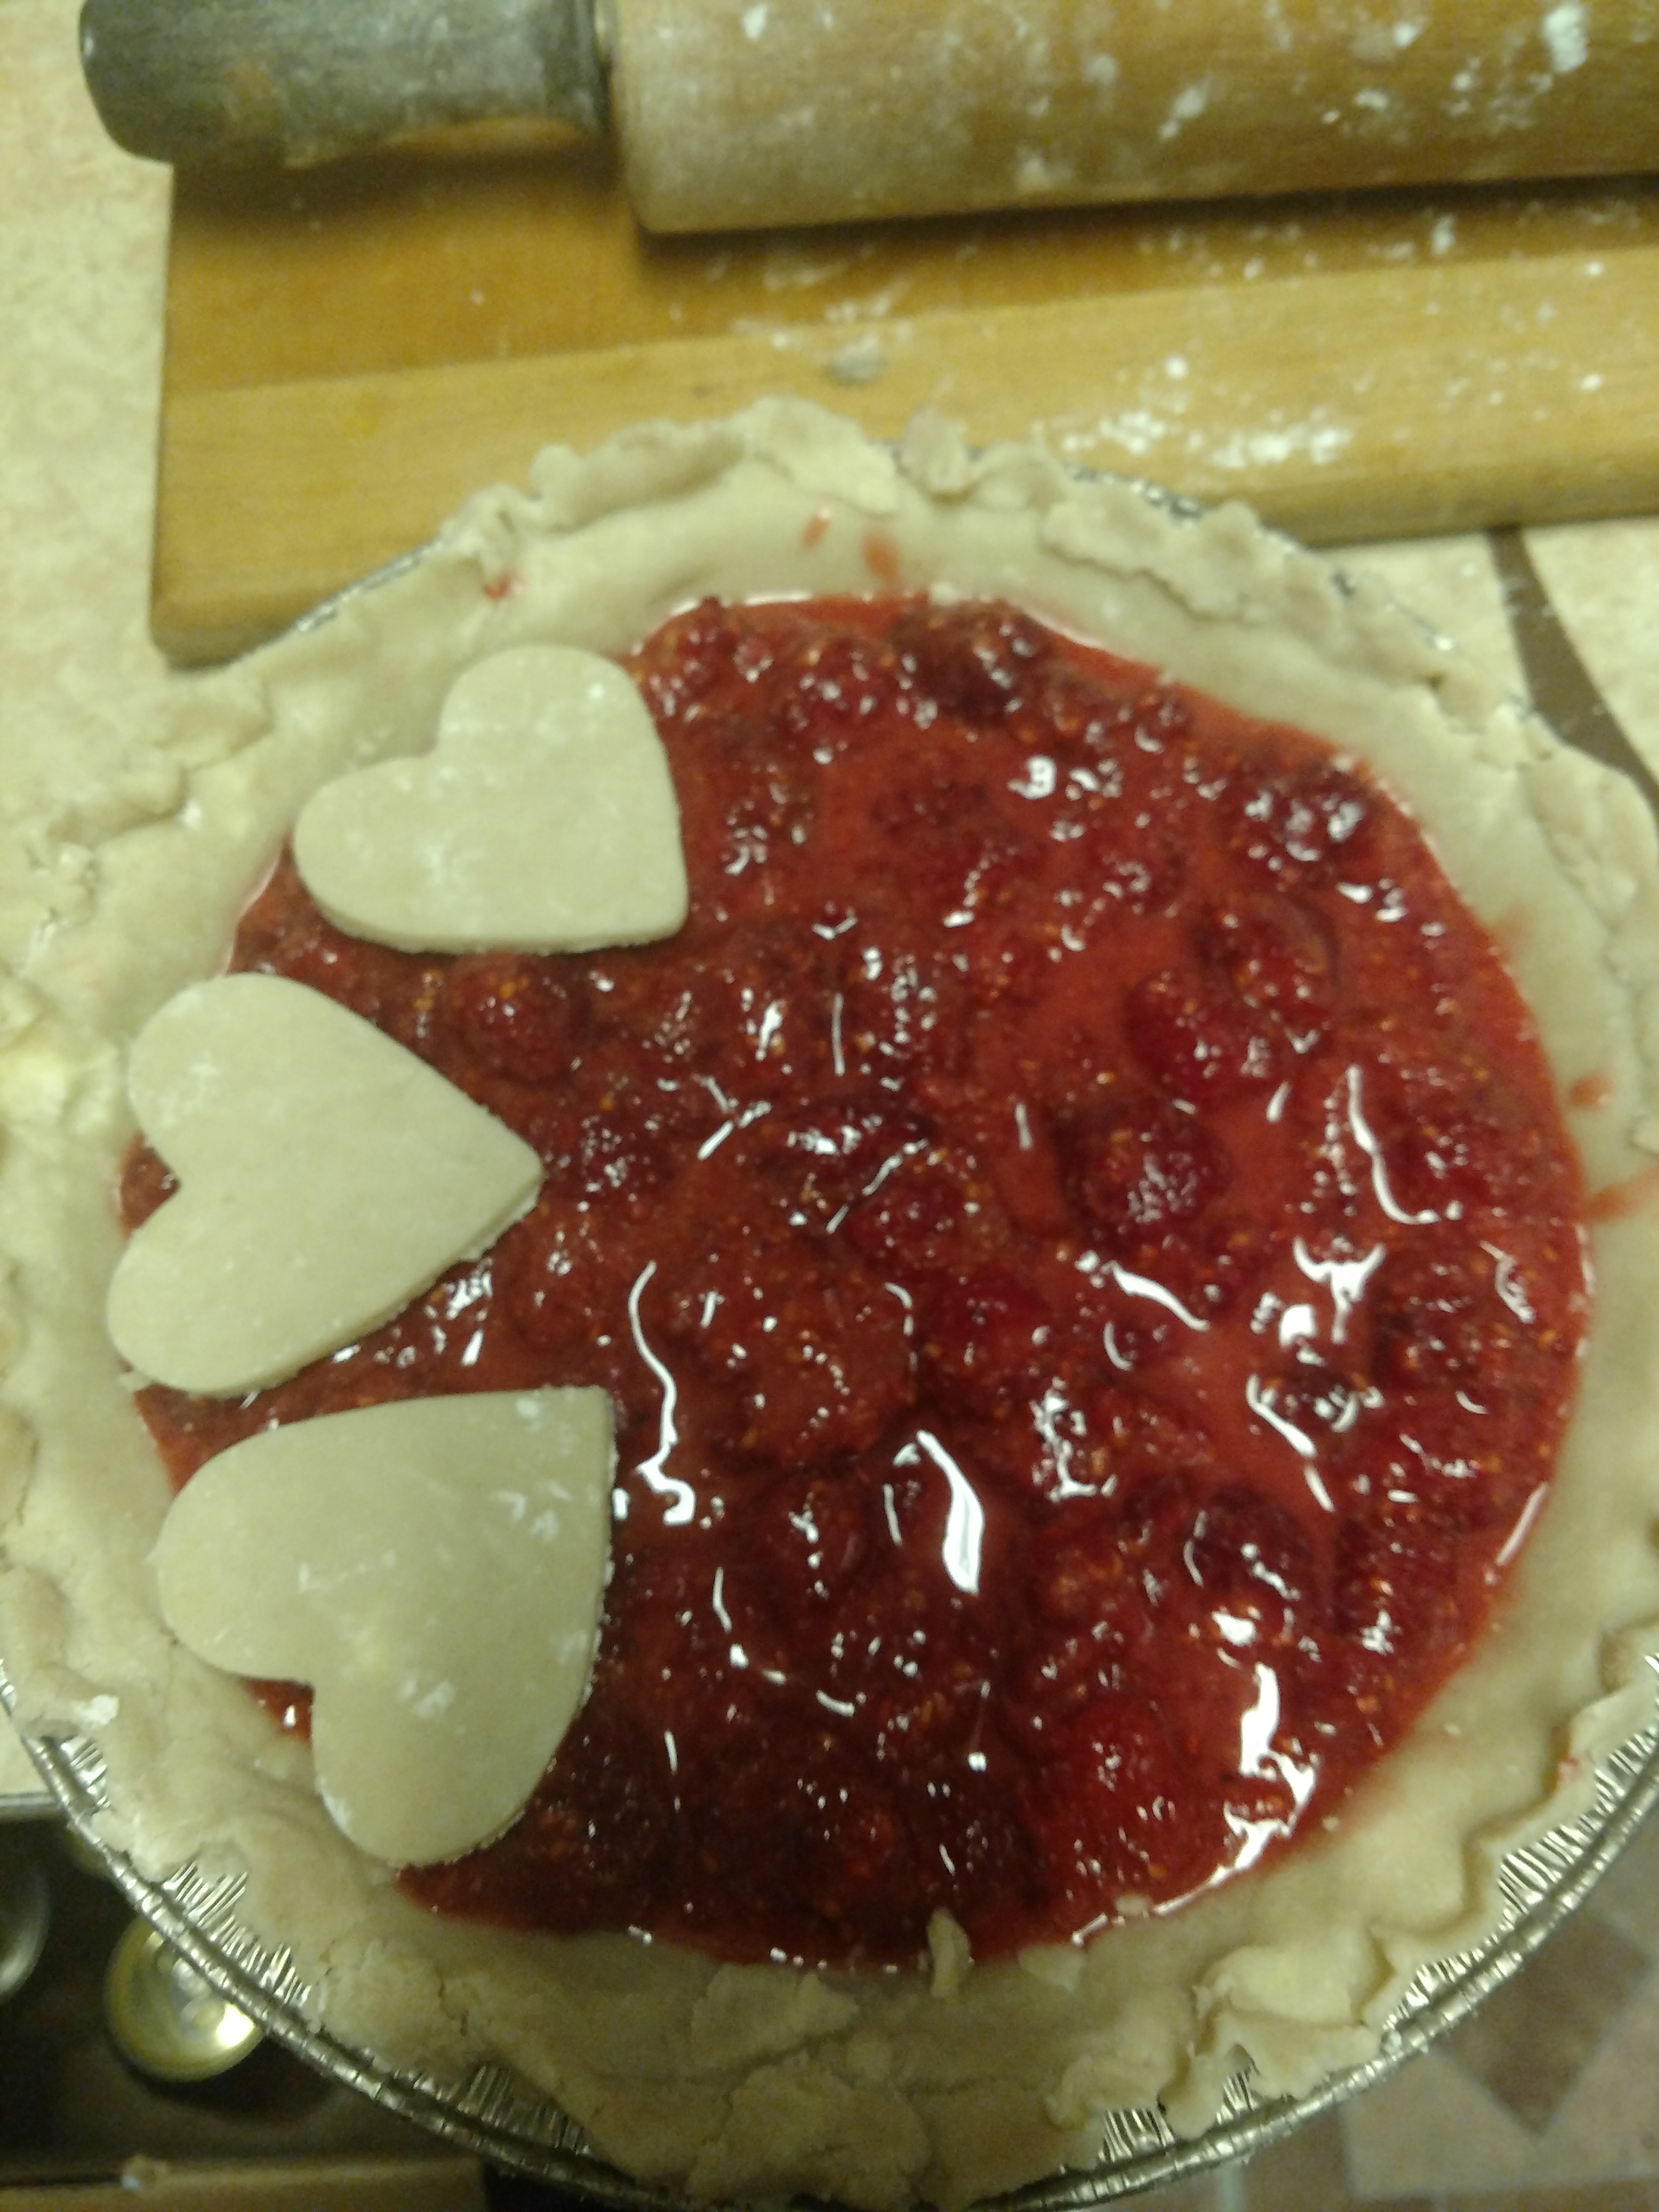
17: Make an egg wash using the yolk of one egg and 1 T water. Spread the wash on the shapes or top pie crust. I do not use the egg wash on the outer ring of the pie; it always seems to make it too dark.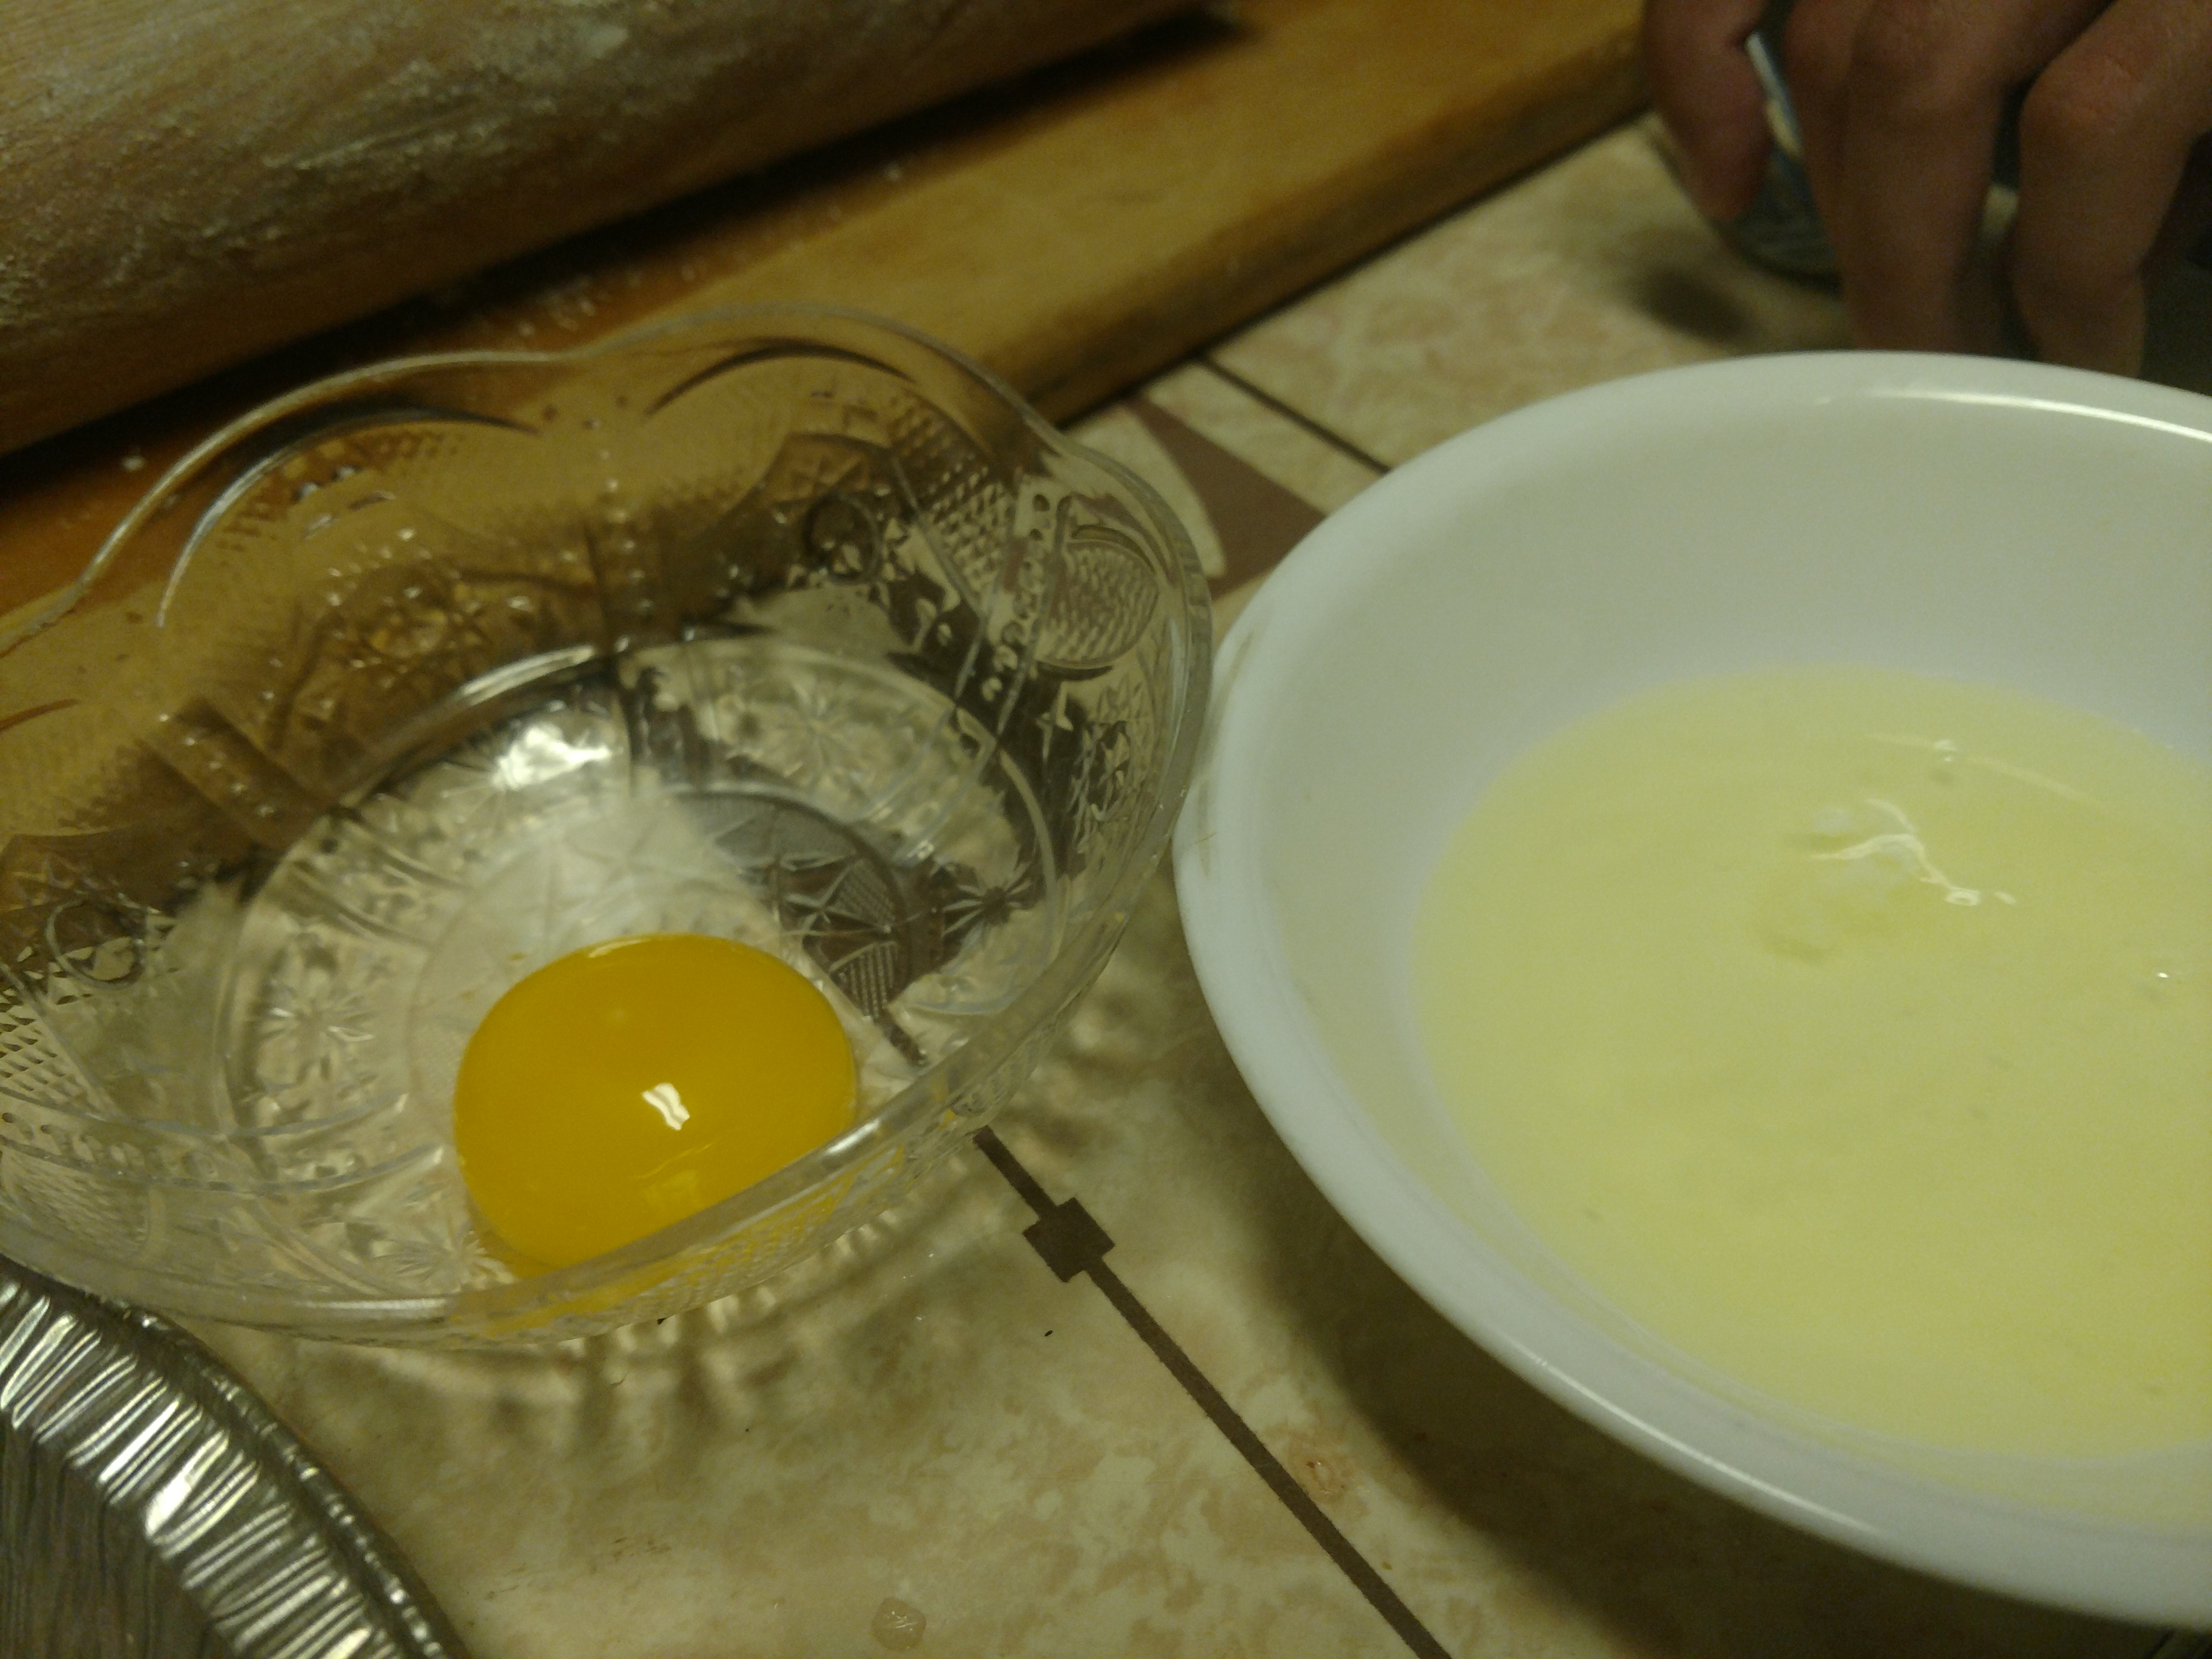
18: Put the pie in the oven on the middle rack. I place a cookie tray on the bottom rack of the oven and line it with some baking paper in case the pie spills. I do not want to have to clean sugary fruit off the bottom of the oven. I also use a pie shield on the edges of my pie. If you do not have one, you can make one out of foil. Bake the pie for about 50 minutes. When it is done, it will have a golden brown color and the filling will look like jelly.
19: Let the pie cool on a baking rack. Let it cool completely before cutting it.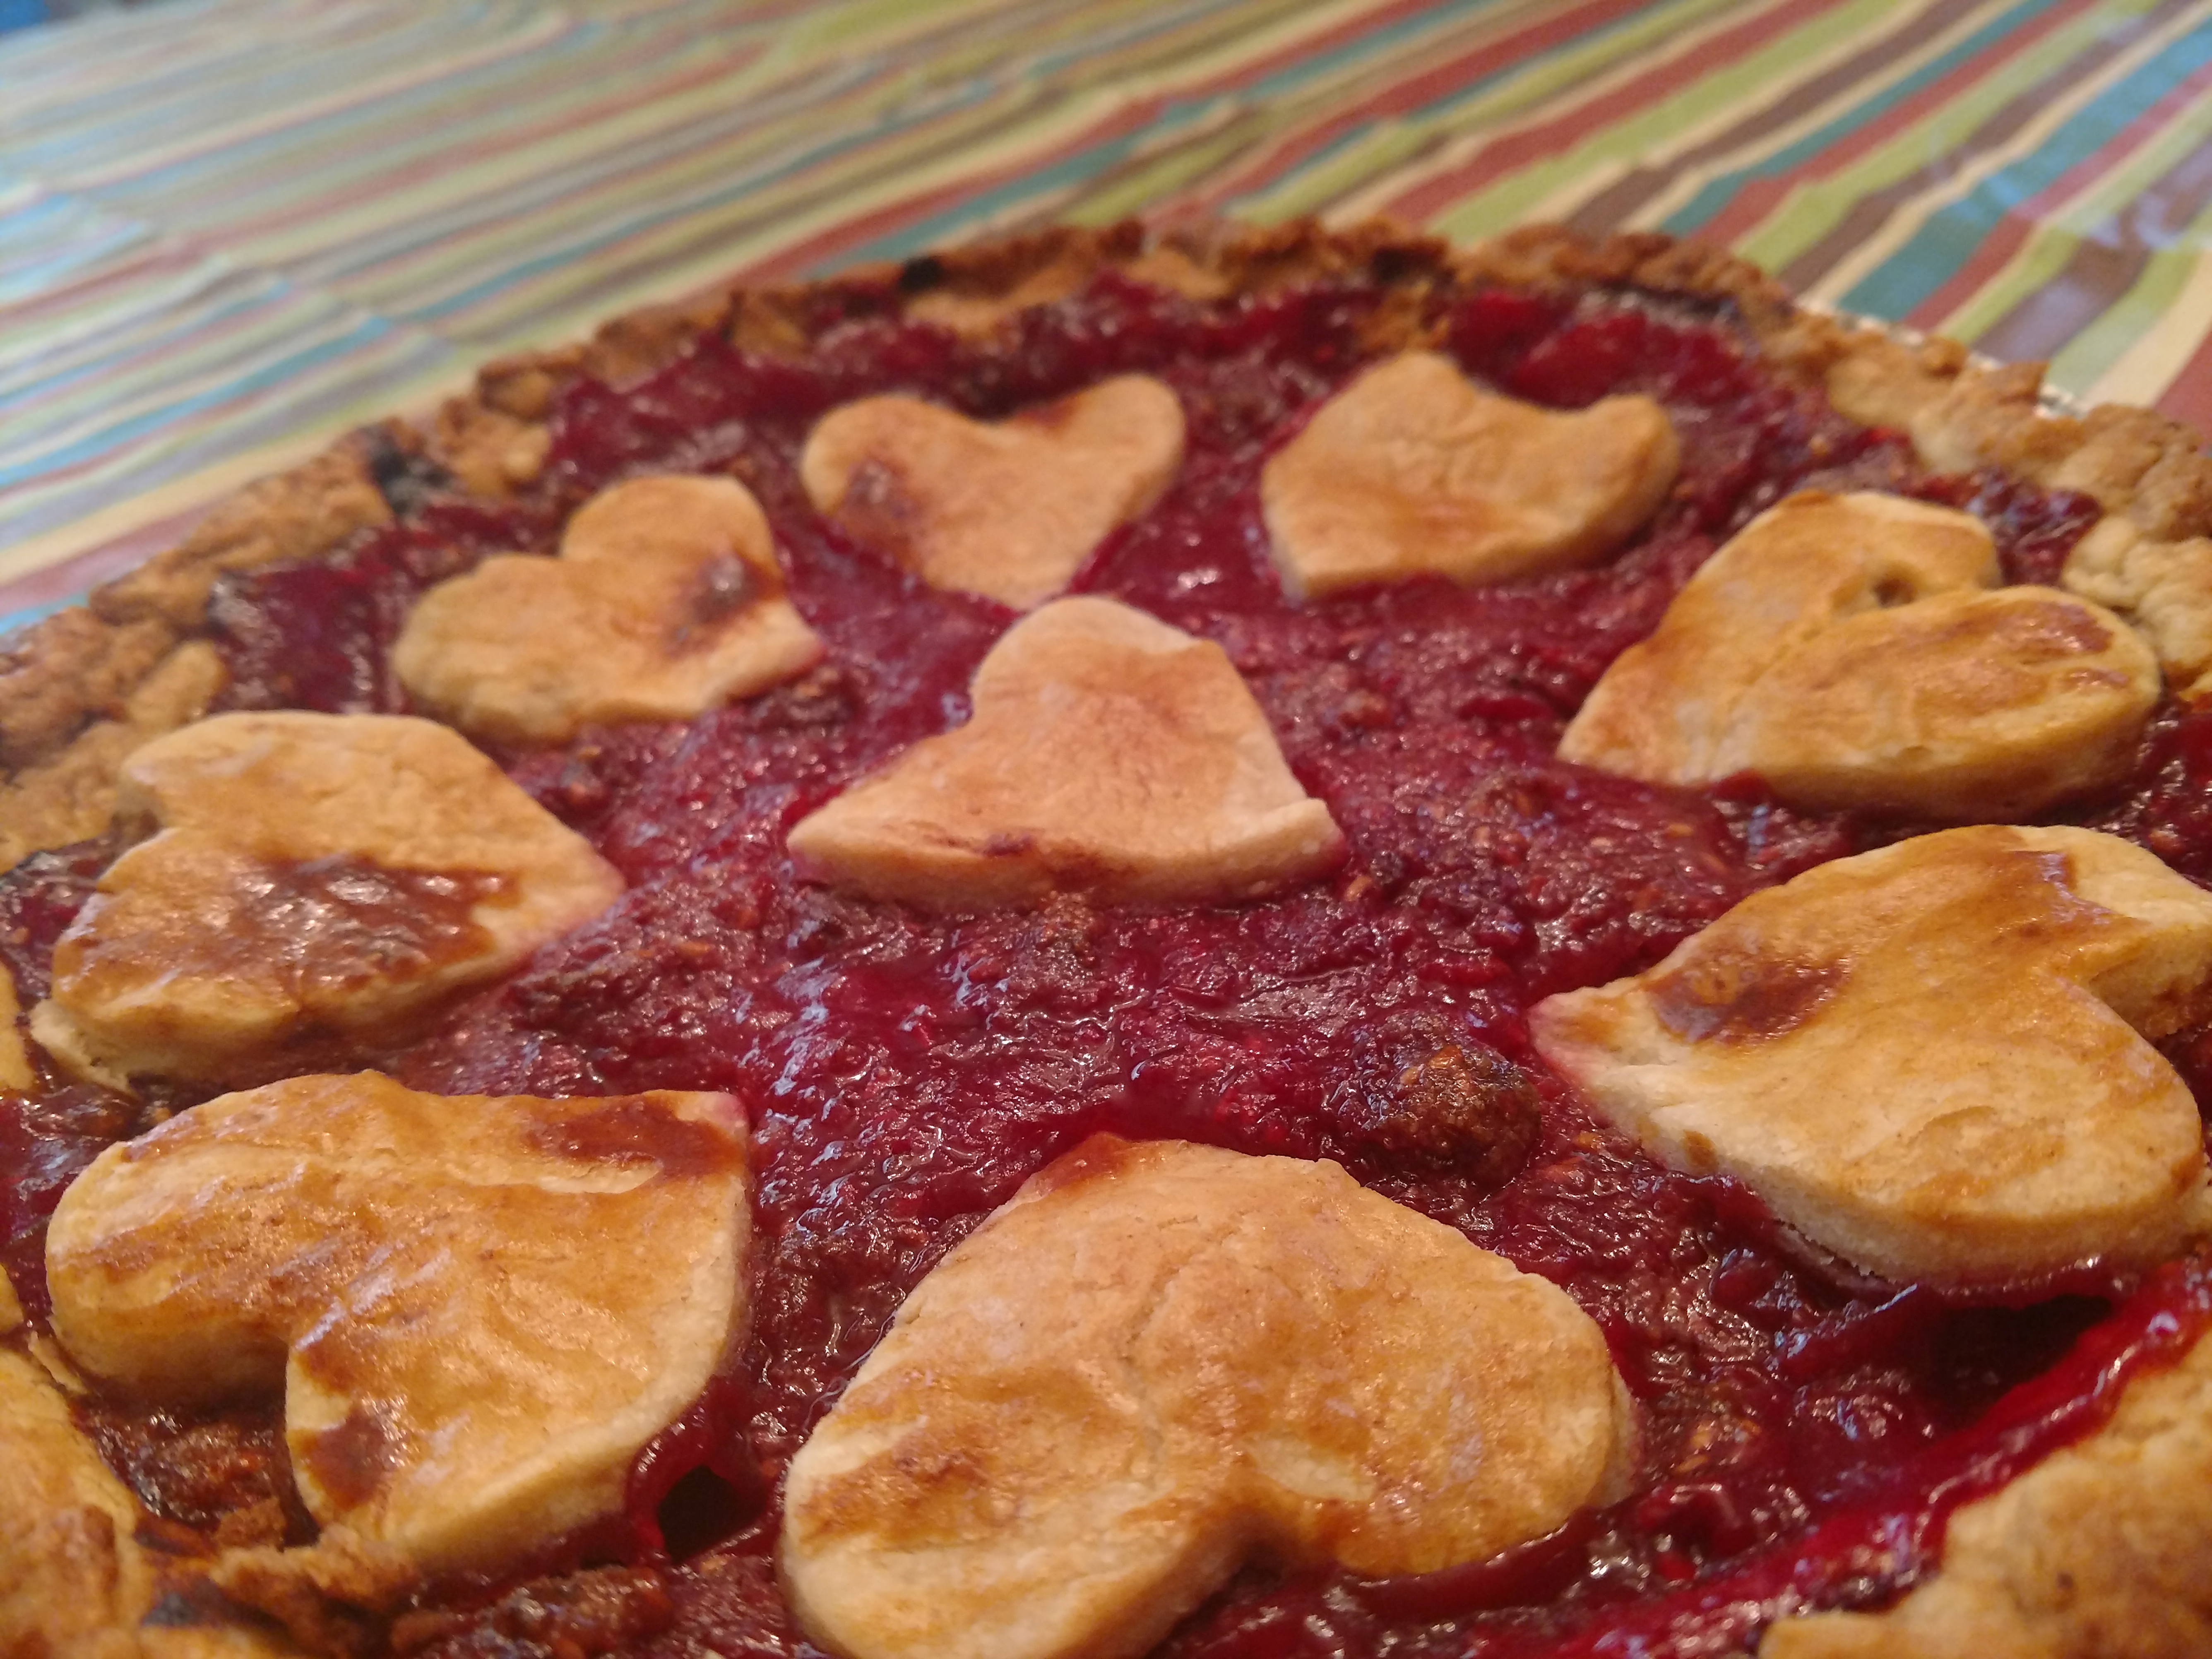
Enjoy!