
Gryffin’s Silk Tie Easter Eggs
We decided this year to try making some silk tie Easter eggs.
What you need:
- 2 dozen eggs
- 3-4 silk ties
- 4-5 white cloth napkins
- Tiny rubber bands, at least two per egg
- 1/4 cup white vinegar
The cloth you use for patterns HAS to be 100% silk, but you can really use any silk, so if you have shirts with holes, or silk remnants, you can use those as well. I think if I started this over, I would have tried to find a bigger variety of similar colors rather than just picking out the ones that called to me. The smaller patterns, in my opinion, look better when transferred to the eggs.
You are going to be transferring the pattern from the silk onto the egg. All of our tie segments retained their original colors as well. You start with raw eggs for this project. You will dye them as they hard boil.
1. Cut up your ties
Work on deconstructing the tie. First, find the seams on the back of the tie and pull them apart with scissors or a seam ripper. At this stage, you aren’t actually cutting fabric, just thread. I also removed all of the labels from my ties, just to get them out of the way. The size of your eggs will determine how big your fabric pieces have to be. You need to be able to wrap the fabric tightly around the egg and secure it, so your pieces need to be an inch or two bigger than your egg’s surface area. The ties are irregular, so each piece will be slightly different.
I had four different patterns. I chose a white and blue scaled tie, a really vibrant orange and black striped tie, a dark blue small paisley, and a brown, green and yellow bigger paisley.
2. Cut cloth napkins in quarters
This step may not be used in every iteration of dying, but we tried it this way because we were told the colors were less likely to run. I have seen several people skip this step, so it’s kind of up to you.
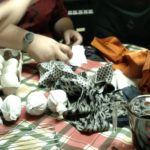
3. Tie Up Your Eggs
The way you wrap your egg is most important step in the process. Lay out the silk with what would have been the outside of the tie face up on the table. You are going to wrap the fabric so that the outside of the tie is against the egg’s shell. First, you put the egg in the center of the strip of fabric, with one end of the egg toward the floor and one end toward the ceiling. Pull the fabric tight around the shell. Any place where the fabric does not touch the shell, there will be no color. Use one of the rubber bands to tie the silk. Wrap the entire thing in one of the squares of white cloth, and secure the end with another rubber band. You could also choose to tie them with baker’s twine or twist-ties, but I find the rubber bands were easier to work with.
4. Boil the Eggs
Place all of your eggs in a pot. Fill the pot with water until all of the eggs are covered, and then just a little extra so the eggs have some room to move around. Pour in 1/4 cup of vinegar. Cover the pot. Put the pot on and bring it to a boil. Once the water boils, let them cook for approximately 8 minutes. Once they are cooked, remove the eggs from the water and move them to a colander, as spread out as possible so they can cool quickly. I run cold water over my eggs so they do not over-cook. It does not seem as though it has any effect on the patterns on the eggs.

5. Unwrap Your Art!
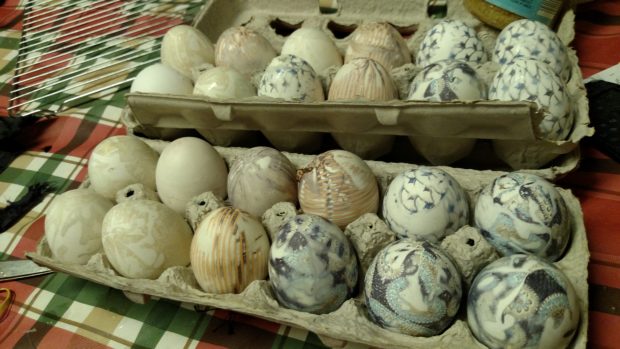
This is the fun part! You get to see just how they’ve turned out. Be careful as you unwrap; it’s possible that you have some steam or some hot water trapped inside the egg still. This is how mine turned out.
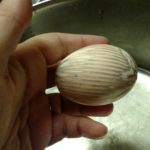

I was most excited about the orange and black stripes. I really wanted to see the perfect stripes transferred onto the egg. I also love Halloween, so if I can bring it into another holiday, I’m going to try. The places where the silk sat firm against the egg turned out really great. The swirls on the edges where they could not lay flat were neat too, but not on the same egg.
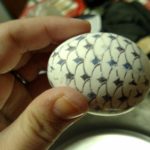
I really did not think this tie was going to be a good choice. There was such a small amount of color; I wasn’t sure it was going to show up well. I hadn’t even noticed until I unwrapped the eggs that some of the diamonds on the tie were blue and some were black. I think this one looks like a dragon egg.

This tie was HIDEOUS. I wouldn’t have wanted anyone to wear it. It made the best egg though. The blues turned out so vibrant, and it was amazing to see the tiny details transfer. 
This egg was the biggest surprise. I expected to see the brown and green and yellow swirl onto the egg. Instead, it almost looked as though it were dipped in an off color oil slick, or tie dyed with some bland colors. It was really cool to see, but I wouldn’t have selected it again. It wasn’t the look I was going for.
I hope your eggs turn out just as lovely. Let us see how they look at our Facebook page, and have a great Easter!
You must be logged in to post a comment.