Patriotic Flag Pretzel Rods
Last Minute Patriotic Treats
I cannot show up to someone’s house without bringing something with me. I just feel this need to provide something when someone is having a party. It could be a bag of ice, a bottle of wine for the hosts to enjoy later, but usually it’s something fun to help bring out the theme of the party. I forgot I have a party in two days! I have a lot going on with Independence Day coming up, and visitors for the weekend, so I needed something that was relatively quick. I wanted something that would bring a lot of color to the party.
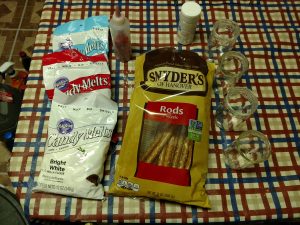
The best part about this recipe for me is that I had all of the ingredients except the pretzels already in the house. I bake often enough that I usually buy a variety of colors of sprinkles or candy coatings when they’re on clearance after holidays. After a quick trip to the store for a bag of pretzel rods, I was ready to go.
If I didn’t already have Wilson’s blue candy melts in the house, I would have purchased the dark blue for this project. You cannot just add food coloring to candy melts. They require special food coloring, either based in powder or oil. Most food coloring is water-based. Even a few drops will ruin your dip. I wanted something a little darker than their regular blue, so I added a single piece of red for about every 10-12 pieces of blue. It turned into this cool denim color that just screamed “American” to me. I actually really like the way that the cheaper candy packaged for making almond bark melts. The white I used on these was from Aldi’s. I have a lot more trouble getting the correct melt from the Wilson’s. I think if I used one of their melt pots I would have more luck, but that’s not on the list of contraptions to add to the kitchen right now. My cabinets are already full!
You cannot heat candy melts on the stove directly. They must be heated in a double boiler. I never use a double boiler that was made to be a double boiler. I usually use my 5 q pot. First I pick the container I want to use on the inside. I always have better luck using a double boiler on the stove than I do microwaving the candy. When I use the microwave, I never get the candy to that point where it’s really smooth and consistent. I should be able to let it fall back into the pan or jar like a waterfall, leaving a coating like paint on whatever I am dipping. I usually use a metal mixing bowl. Most of the time I am dipping Oreos or other cookies, so this shape is great. When I make these pretzels next, I am going to use a glass or a mason jar. When you decide on the inner container you would like, place it in the pot. Fill the pot with water until it is about an inch below the rim of the inner container.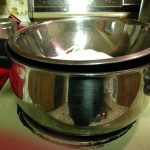
Heat the water until it is almost boiling. On my electric stove, I put it on medium high. If you are worried about the open flames on a gas stove, you can use an electric burner or even an electric skillet. The melts will begin to liquify. I use a fork to stir the candy or chocolate and help it along. Once it is nice and melted, turn the stove down. Mine has to go all the way to low to keep the temperature correct. Sometimes I have to fiddle with the temperature on the stovetop the entire time I am making candy. It is easy to over-cook your candy. It has a very distinct smell to me when it is about to burn. Be careful not to get any water in the inner container. As little as a drop can ruin the consistency of your candy. If your candy starts to look like play-dough, you can add a few drops of vegetable oil or shortening. Stir consistently as you drizzle the oil into the candy. Any candy that you have added oil to may not dry quite as hard, so I try to avoid it.
I could not quite dip the pretzel into the bowl I chose all the way. Since I 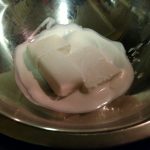 used the melts from Aldi, I was able to wait until they were nice and melty and use my rubber spatula to pick up the candy and drape it like a waterfall. I spun the pretzel under the candy until it was evenly coated. I coated about the top five inches of the pretzel. Hold the pretzel over the pot for a few moments to allow any excess candy to drip off.
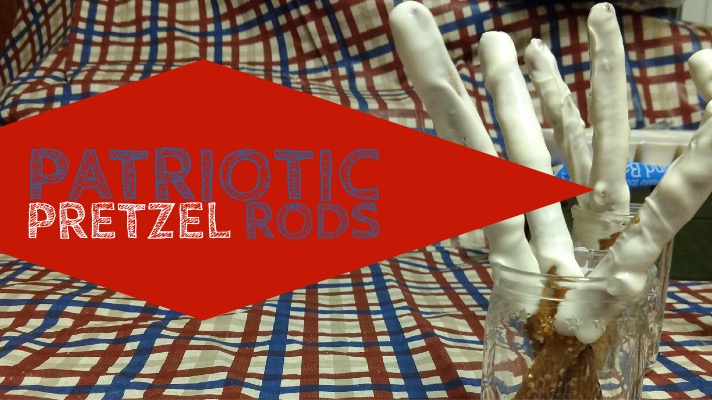
Allow the white to dry. Place the pretzels into a cup. I use jelly jars and juice cups to hold them upright while they dry. I can fit about 3 pretzels into a juice cup. I melted four blocks from the almond bark coating. Since all of my candy was gooey, I was able to use absolutely all of what was melted in the bowl. I covered about 18 sticks. They needed about 30 minutes to cool. Some of them I had to pop off of the edges of the cups. If you apply pressure evenly, you will not break your rods. I would be worried if I left them there overnight to dry that it may have made the candy too hard to pop off.
Next, melt your blue, and your red if you would like the denim look. I used a small crock container that I usually use to make French onion soup. Dip the tips of your rods into the melted candy. I dipped them about 1-1.5 inches. It is easy to melt the white that is already on the pretzel, so be sure to pull the pretzel back out of the dip as soon as possible. I coated my blue in a mixture of silver and white sugar. I think next time I might use a white sprinkle instead to show up a little better against the light blue, but these look whimsical. I sprinkle the sugar over the rod. If I dip it immediately into a bowl or glass filled with sprinkles, the wet blue candy will become disfigured, and the tips of my pretzels will be naked! I choose the mixture of silver and white because individually, I felt like they blended into the blue. Together, I feel as though they enhance it and give the impression of the stars that I intended. I was not able to use all of the blue that I melted. I had to melt about 30 pieces to make it deep enough, but since it would not become pliable to use with the spatula, I had to throw some out. Allow the blue to dry.
Line your table with newspaper or baking paper. Place your cookie racks on the table over the 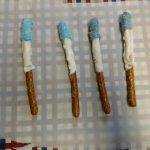 paper. Spread your pretzels across the cookie racks. Using a bottle, a zip top bag or a decorating bag, melt just a few red candy melts. Cut the tip of the decorating bag or the corner of the zip top bag and drizzle stripes across your pretzels. Allow them to dry. If you would like, you can flip your pretzels over and drizzle the other side as well. You can also hold a single pretzel and spin it beneath the drizzle to add stripes. If you do this, you need to put the pretzel back into the glass to dry. I do not like this method; it did not work well for me.
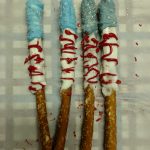
Pack them up in a zip top bag or in your lidded cake pan to take to your picnic. You can serve them laying down, or present them in a mason jar. A little ribbon makes them look that much more festive. I hope your family enjoys them as much as mine did! There were none left!

